Imaginary Realms: A Fun Introduction to Composite Photography
- Jill MG
- Aug 4
- 4 min read

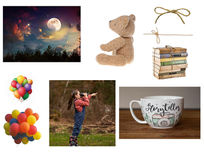
Composite photography is an art form that combines multiple images into a single, cohesive piece. It's a powerful tool that allows photographers to create scenes and tell stories that go beyond the constraints of a single shot. Whether you’re looking to add a touch of surrealism, create fantastical worlds, or simply enhance your photos, composite work opens up a realm of creative possibilities.
Basic Skills Required
Before diving into composite photography, it’s important to have a grasp on a few foundational skills:
Photography Basics: Understanding how to use your camera, control lighting, and compose a shot is essential. This ensures you capture high-quality images to use in your composites.
Photoshop Proficiency: Composite work heavily relies on photo editing software, with Adobe Photoshop being the most popular choice. Familiarity with layers, masks, blending modes, and selection tools is crucial.
Attention to Detail: Successful composites require meticulous attention to detail to ensure all elements blend seamlessly. This includes matching lighting, perspective, and colour tones.
Creative Vision: The ability to envision the final image and plan the necessary components is key. This involves both imagination and planning skills.
Finding Ideas and Inspiration
Generating ideas for composite work can be one of the most exciting parts of the process. Here are a few ways to find inspiration:
Other Artists
Follow Other Photographers: Social media platforms like Instagram, Behance, and 500px are great places to discover the work of other composite photographers. Pay attention to their techniques and how they combine elements to tell a story.
Photography Books and Magazines: Books like "Adobe Photoshop Master Class: John Paul Caponigro" offer insight into the thought processes and techniques of master composite artists.

Children’s Stories and Imagination
Fairy Tales and Storybooks: Classic children’s stories are filled with fantastical imagery and imaginative worlds. Consider how you might bring scenes from your favourite stories to life using composite techniques.
Collaborate with Kids: Children have boundless imaginations. Spend time with your kids or those of friends and family, listening to their ideas and seeing the world through their eyes. Their unique perspectives can inspire incredibly creative composite projects.
The World Around You
Nature and Urban Exploration: The natural world offers endless possibilities for composite backgrounds and elements. Capture textures, landscapes, and objects during your walks or travels to use in your projects.
Daily Life and Mundane Objects: Sometimes, the most ordinary objects can become extraordinary when used creatively. Look around your home or neighbourhood for interesting shapes, patterns, and colours that can be incorporated into your composites.
Steps to Create a Simple Composite
Conceptualize Your Idea: Sketch your idea or write down a description. This helps you visualize the final image and identify the elements you need, and is my most important piece of advice! Refer back to this sketch frequently throughout the process.
Gather Your Images: Take or source the photos you need. Ensure they have similar lighting and perspective for a more natural blend. If the colour is not right, this can be easily fixed with some colour grading. Lighting on the other hand can be a little more tricky! Having the lighting match your scene from the beginning will make your life incredibly easier!
Open Photoshop and Create a New Document: Start with a blank canvas or use one of your background images. starting with a blank canvas is sometimes the easiest way to ensure you can put all of the elements where they need to be. However, if you are simply adding to a small portion of an existing image, just open that image to get started.
Add and Position Your Elements: Use layers to add each element. Utilize selection tools (like the Magic Wand or Lasso Tool) to cut out parts of images. Place them on your canvas and adjust their position and size. If your goal is to keep it realistic, try to ensure that the scale is appropriate as you resize the element.
Blend the Elements: Use layer masks to blend the edges and adjust the opacity to make the elements integrate seamlessly. The Brush Tool and Gradient Tool can help with smooth transitions.
Adjust Lighting and Colours: Match the lighting and colour tones of each element using adjustment layers (like Curves, Levels, and Hue/Saturation). Often, I like to pull these elements into the camera RAW filter to use the colour adjustments available in there. This is also where it's easiest to adjust the clarity and white balance if necessary. Paint on additional lighting where required using the curves and levels layer.
Add Final Touches: Apply final adjustments, add effects if desired, and sharpen your image to bring it all together.

Composite photography is an exciting and limitless field that allows photographers to push the boundaries of reality. By mastering basic skills and finding inspiration in the world around you, children's stories, and the work of other artists, you can create compelling and imaginative images. Start experimenting today, and let your creativity guide you to new photographic horizons.
Feel free to share your own composite work and tips in the comments. Let’s inspire and learn from each other! Happy compositing!


Comments